Why trekking poles matter on wet heather and muddy ridgelines
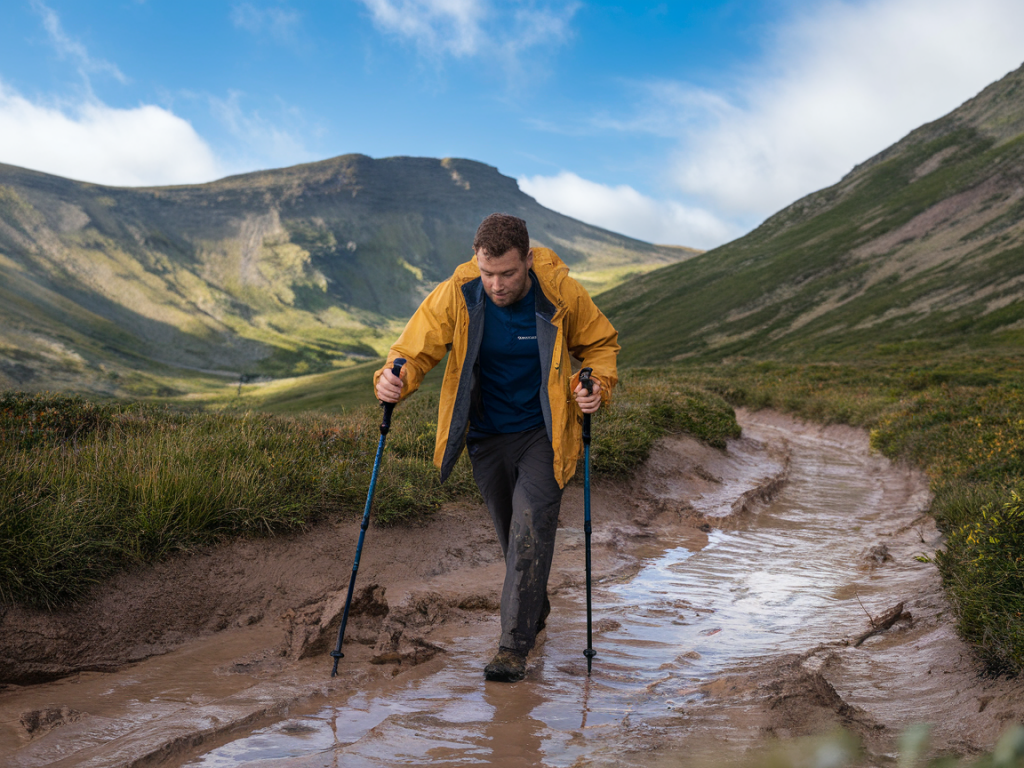
I've spent a lot of time moving through the edges of Britain — damp peat hags, coastal heather and narrow, boggy ridges — and one thing is consistent: when the ground turns slick, your feet alone won't save you. The right pole setup can mean the difference between confident steps and skidding sideways through clumps of heather.
Poles do more than stop you falling. They help you test hidden bog, redistribute load on steep uphills and descents, and give you a third and fourth contact point on exposed ridgelines. But not every lightweight pole translates that advantage into grip on wet vegetation or mud. Below I cover the components and techniques I turn to, with real-world pros and cons and specific kit examples where it helps.
Core principles I follow
- Traction at the tip is king: you can have the best shaft, but if the tip slips on heather or mud you won't gain anything.
- Simplicity and reliability: light doesn't mean delicate. I prefer poles that survive being planted into bog and dragged through gorse.
- Adjustability: quick length tweakability is vital on mixed terrain — you need longer poles on climbs and shorter on rough descents.
- Technique beats torque: a good setup helps, but planting technique (angle and timing) is what really stops you slipping.
Tip choices — what actually grips
Most poles ship with a small rubber tip over a metal point. On hard ground that’s fine. On wet heather and muddy ridges I use a hierarchy of tips depending on conditions:
- Carbide steel tip (exposed): the bare metal point is the best for piercing peat, roots and compacted mud. It bites into vegetation and gives a secure anchor. The downside is it wears and can damage paved surfaces — keep the rubber tips for those sections.
- Replaceable carbide ferrules: many poles have threaded or riveted carbide tips you can replace. I always carry a spare set.
- Small, deep snow/mud baskets: not the huge snowbaskets — rather, low-profile, slightly concave mud baskets that prevent the pole sinking too deep into a soft peat hole and give a broader platform in sloppy ground.
- Aggressive rubber tips: companies like Black Diamond sell “Traction” tips: rubber with embedded studs that improve grip on rock and compacted wet turf. Use them when there's a mix of rock and bog.
Shaft material and sections — carbon vs aluminium, two vs three pieces
Lightweight is important on long border hikes, but I balance weight with durability.
- Carbon shafts: excellent for weight and vibration damping, but they can snap if you lever them hard against a root or wedge them into a crevice. I use carbon poles on maintained coastal paths and peat edges where I’m not plunging poles into hidden voids. Examples: LEKI Micro Vario Carbon, Black Diamond Alpine Carbon.
- Aluminium shafts: heavier, but they bend before breaking — useful when you rely on poles as anchors on muddy ridgelines. Many hikers still prefer aluminium for British uplands.
- Two-section vs three-section: two-section poles are often sturdier and quicker to adjust; three-section poles pack smaller but have more joints that can fail or collect water/peat. For multi-day border routes I favour two-section twist or flick-lock poles for reliability.
Locking systems — twist vs flick (lever) locks
Both systems work, but in wet, muddy conditions I prefer strong external lever locks (flick-locks). They hold well under repeated heavy planting and won't seize as easily as twist locks when silt and grit get inside. High-quality flick locks from Leki, Black Diamond and Komperdell are quick to operate even with gloves on.
Grips and straps — the fit that lets you trust the pole
Cork grips are my go-to: they shed water, mould to your hand and remain comfortable on long days. Foam is warm but can soak and become slippery. Long grips that let you choke up on steep slopes — or hand positions for side-hilling — are useful. Wrist straps should be adjustable and quick to release; I avoid anything that’s fussy in gale or rain.
Anti-shock — useful or not?
Anti-shock springs can reduce hand strain, but they add complexity and can flex unpredictably when you rely on the pole as a hard anchor on a muddy ridge. For technical sections where I might use the pole to arrest a slide, I prefer non-damped poles. If you have joint issues and mostly walk gentler terrain, anti-shock can be worthwhile.
Effective lightweight setups I use
| Setup | Why I use it | Pros | Cons |
|---|---|---|---|
| Aluminium 2-section + carbide tips + small mud baskets | Everyday border hikes with bog and heather | Strong, reliable bite into peat; quick length adjust; durable | Heavier than carbon; noisy on rock |
| Carbon 2-section + replaceable carbide ferrules + rubber traction tips | Long coastal ridge days where weight matters but you still meet wet turf | Light, comfortable grips; decent bite with carbide; lower fatigue | Carbon risk of fracture if abused |
| Collapsible micro poles (compact) + steel tip + mud baskets | Fastpack style days when packing size matters | Small pack profile; surprisingly secure with carbide tip | Less sturdy under heavy leverage |
Practical technique to stop slipping
Even the best pole setup needs to be used correctly. Here are the techniques that consistently keep me on my feet:
- Plant low and forward: on a descent, plant the pole slightly ahead and angling down the fall line so the tip can bite in rather than slide sideways.
- Test before committing: jab the pole into heather or bog to feel for solid root or peat beneath — if it collapses a little, move a few centimetres.
- Use both poles as a unit: stagger your pole plants rather than planting together; this gives continuous support through uneven ground.
- Lean into the pole: transfer a little weight onto the pole at each placement so the tip is loaded and more likely to hold.
- Avoid levering hard against a single pole: on very soft ridgelines use both poles and deploy your feet deliberately — the pole is an aid, not a crutch that takes all load.
Kit I keep in my pack for wet-border days
- Spare carbide ferrules and a small multi-tool for tightening flick-locks.
- A pair of compact rubber tip protectors for pavement and stiles.
- Extra small mud baskets — they fit in a pocket and change how the pole interacts with peat.
In short: if you're moving across wet heather and muddy ridgelines, prioritise a pole tip that actually bites (carbide), a reliable lock system (external flick-locks) and a shaft material that matches how hard you plan to use the poles. Learn to plant with weight and angle in mind, and carry a couple of simple spares. With that combination you'll find your confidence rises faster than the trail you’re climbing.