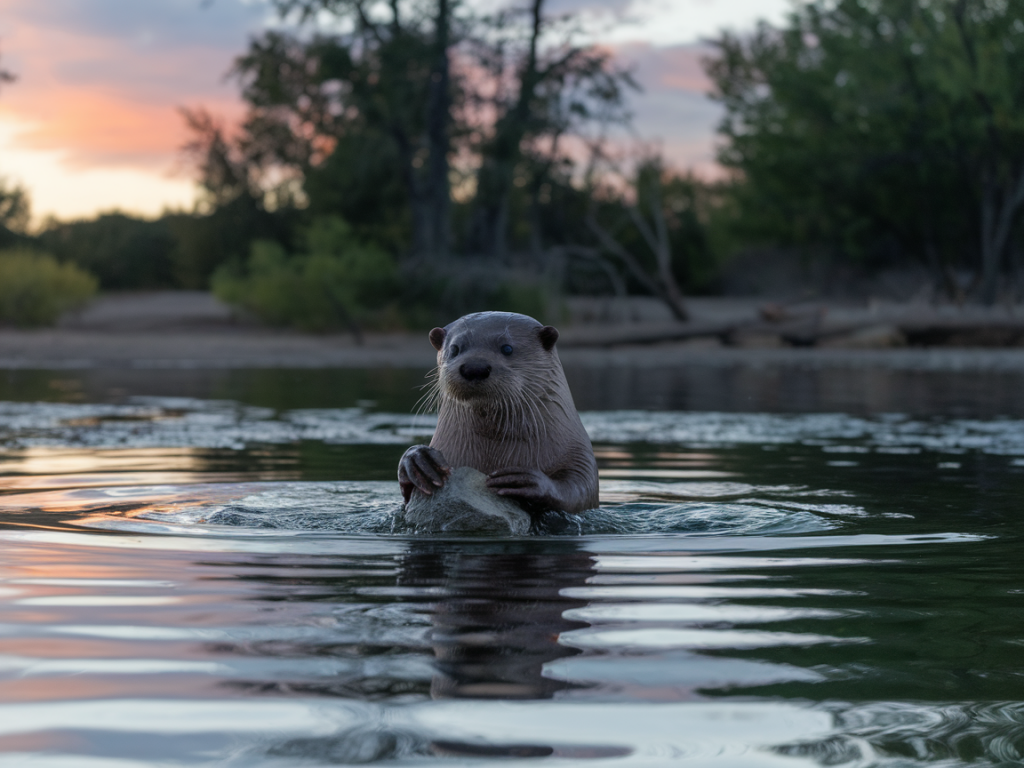
When the light softens and the river quiets, otters slip from shadow into the shallows — the sort of moment that makes you forget the hours of waiting, the cold knees and the careful packing. Photographing foraging otters at dusk is one of those rare rewards where patience, kit and a strict code of restraint come together. Over the years I've learned how delicate those moments are, and how easy it is to ruin them. Here’s how I approach dusk otter photography in a way that prioritises the animals while still giving you a chance at meaningful images.
Why dusk matters — and why to be careful
Dusk is prime time for otters because their prey activity increases and human disturbance usually drops off. The light is also forgiving: cooler tones, soft contrast and reflections can make images that feel intimate and wild. But otters are highly sensitive to disturbance. A single flashlight beam or a clumsy approach can send them diving for cover and put a stop to feeding for the evening. Ethically, our job is to observe without altering behaviour — any photograph taken should be the result of restraint, not coercion.
Timing and reading the site
I scout locations during the day to learn the otters' preferred routes, feeding spots and likely haul-out points. Dusk changes everything: the river’s sound, the air temperature and insect activity. Aim to arrive at least 60–90 minutes before sunset so you can find a hide, test angles and settle quietly. If you’re new to a site, multiple short visits are better than one long intrusive session.
Key cues I watch for:
Approach and concealment
Concealment is more than a blind; it’s about being part of the riverbank for a while. I favour natural hides: reeds, fallen trees or low tussocks that break up my silhouette. When vegetation is sparse, I use a low-profile ground blind or set up behind a raised bank. Avoid shiny clothes and anything that reflects light.
Movement needs to be deliberate and slow. I stagger my approach with pauses — move 10–20 metres, stop five minutes — until I’m settled. If possible, use an approach path that keeps you below eye level relative to the bank; being higher makes you more visible against the skyline.
Light management: torches, red filters and screen dimming
Direct white light will alarm an otter. I use the lowest possible illumination for safety and navigation — a headtorch with a red filter is essential. Red light is less disturbing but still allows you to see; many headtorches have an adjustable red mode (Petzl, Black Diamond, Fenix all make models with usable red-output modes).
For camera work, I avoid using any light that would be visible to the otter. If I need to check settings, I do so between bursts and with the back-screen dimmed. If you must illuminate the subject to focus, do it from an angle that skims the water and from as low as practical; even then, be conservative. Remember: every flash or bright torch carries a risk of interrupting feeding and causing stress.
Essential kit
Your kit should help you work silently and at distance. Here’s a compact list of what I take for dusk otter sessions:
| Item | Purpose |
|---|---|
| Telephoto lens (300–600mm) | Shoot from a respectful distance, compress perspective |
| Fast prime or zoom (f/2.8–f/4) | Work in low light and keep ISO down |
| Rigid monopod | Support for long lenses with minimal movement; less imposing than tripod |
| Headtorch with red mode | Navigation and setting checks without startling wildlife |
| Beanbag or groundpod | Ultra-low support for stealthy angling from bank level |
| Weatherproof cover | Keep gear dry in damp conditions |
| Extra batteries and memory cards | Dusk sessions eat power and storage |
I often bring a fast 300mm f/2.8 (if weight allows) or a 100–400mm zoom. The latter gives flexibility for varied distances and is lighter for long sits. If you have a 1.4x extender, test it beforehand — added reach can be useful but reduces light-gathering ability and AF speed.
Camera settings and technique
Start with a balance between shutter speed and sensitivity. Otters move quickly and unpredictably; aim for at least 1/500s for full-body action in low light, increasing if you want to freeze fast lunges. I use these starting points:
Shoot bursts sparingly. Continuous high-speed fire will fill cards quickly and disturb the silence. Short, thoughtful bursts are better. If the behaviour is static — an otter grooming or resting — reduce frame rate and focus on composition and timing.
Composure, storytelling and what to aim for
Otters are as photogenic in small gestures as in big leaps. Look for moments that tell a story: a successful catch, a groom, a dive with a trailing spray, or the subtle exchange between a mother and pup. Low angles and reflections often add emotional weight — bring the lens to water level using a beanbag and watch how reflections and ripples frame the subject.
Remember, not every shot needs to be tack-sharp. Environmental portraits — slightly softer, with contextual elements like reed beds or peat-stained banks — can convey atmosphere better than a clinical action capture. I often intentionally include foreground elements to show distance and habitat, which underscores the ethical aspect of observing from afar.
Minimising impact — ethics in practice
My non-negotiables when working with otters:
Reporting sightings to local wildlife groups or otter monitoring schemes can help conservation, especially if you record unusual behaviour or evidence of injury. Photography should support conservation, not undermine it.
Dealing with disappointment
Sometimes dusk brings nothing but empty banks and frogs. That’s part of the rhythm. I treat every session as fieldwork. Even failed shoots teach you more about the animals and the landscape: how tides affect foraging, which banks hold fish, when human activity spikes. These lessons eventually compound into better planning and more considerate photography.
If you’d like, I keep a short list of my favourite hides and kit combinations for UK rivers — drop me a line via the contact page on Borderhike Co. — but I’ll always caveat that with the need for discretion and a gentle hand when sharing locations.