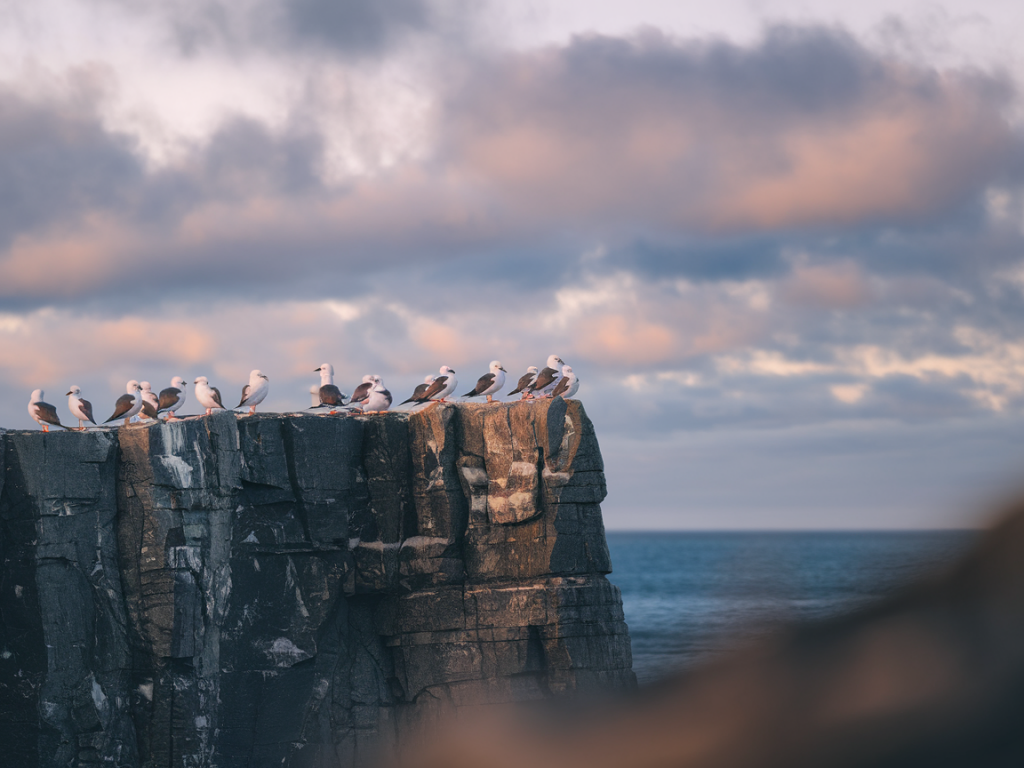
I often plan cliff-nesting kittiwake shoots around the same two priorities I have for any wildlife photography: get close enough to make meaningful images, and stay far enough away to leave the birds exactly as I found them. Dawn is my favourite time — the low light sculpts the cliffs and the kittiwakes’ pale plumage takes on a buttery glow — but it also concentrates bird activity and the risk of disturbance. Below I share the practical kit, approach and camera settings that let me make intimate images of kittiwakes at first light without changing their behaviour.
Why dawn matters (and why it complicates things)
Dawn gives you the soft, directional light that flatters cliffs and picks out feathers, plus lower visitor numbers and calmer winds some days. But it also means working in low light, cold hands and birds that are more sensitive because they’re returning to nests, incubating eggs or feeding young. That combination calls for careful planning: long glass to keep your distance, fast lenses or higher ISO to freeze motion, and a strict no-disturbance mindset.
Ethics first: the golden rule of seabird photography
I follow a handful of simple ethical rules every time I photograph breeding seabirds. If a bird stops feeding, leaves a nest, or calls repeatedly when you arrive, you are too close. I will always:
- Keep a respectful distance — use optics to frame birds, not footsteps.
- Avoid playback, calls, baiting or any attempt to draw birds closer.
- Minimise time spent near nesting areas and avoid trampling vegetation or collapsing burrows/cliffs.
- Record evidence of disturbance (notes or photos) and move away if the birds show signs of stress.
Lens and optics: how long is long enough?
For me the lens choice solves the ethical dilemma. I prefer to use glass that lets me frame tight portraits and action from 50–300 metres. Typical options I use or recommend:
| Situation | Lens/Optic | Why |
|---|---|---|
| Perched birds on cliff ledges | 300mm–600mm (full-frame equivalent) | Tight headshots while staying out of nesting zones |
| Close approaches from a low-visibility hide or vehicle | 200mm–400mm fast zoom (f/2.8–f/4) | Versatility and better low-light performance at dawn |
| Extreme distance or scope digiscoping | Spotting scope + camera adapter | Allows photography well beyond disturbance distances |
On modern mirrorless bodies, a 600mm f/4 or 400mm f/2.8 is ideal; on a budget, a 100–400mm or 150–600mm zoom (Sigma, Tamron, Canon RF 100-500, Sony 200-600) will do the job if you accept cropping. Digiscoping with a Swarovski, Kowa or Nikon scope is a valid alternative for extremely distant cliffs.
Approach and concealment
Getting the light right is one thing; not bothering the birds is another. I use these tactics to reduce my visual and auditory footprint:
- Scout the site in daylight before dawn. Know the cliff faces, nest concentrations and likely access routes so you can be efficient in the dark.
- Arrive quietly and park out of sight if using a vehicle hide; when on foot, move parallel to the cliffs rather than closing directly towards ledges.
- Use natural cover — sea stacks, headland slopes, dune humps — to break your silhouette. If none exists, a small portable hide or a camouflage jacket and low profile works.
- Wear muted colours and avoid sudden movements. Keep any conversation to a whisper and silence phone cameras or beeps.
- If using a hide, give birds time to resume normal behaviour after you settle in — at least 10–20 minutes where possible.
Camera settings for dawn cliff shots
Dawn requires compromises between shutter speed, aperture and ISO. I use these settings as starting points and adjust according to light and subject behaviour.
- File format: RAW for maximum exposure and white balance flexibility.
- Drive mode: Continuous high for flight sequences; single for perched birds.
- Autofocus: Back-button AF if you use it; continuous AF (AF-C/Servo) with a small group/zone for flight. Eye-detect AF helps with perched portraits if it’s reliable on your system.
- Shutter speed: Perched birds 1/250–1/500s; slow wingbeats or gliding 1/1000s; active takeoffs and fast wingbeats 1/1600–1/3200s.
- Aperture: As wide as you need to keep shutter speed up (usually f/4–f/8). Wide aperture separates bird from cliff but reduces depth of field — check focus carefully.
- ISO: Don’t be afraid to push ISO at dawn. Modern sensors handle 1600–6400 well; I prioritize a cleanly frozen image over a noisy one that has lost sharpness to motion blur.
- Exposure compensation: Kittiwakes are white; use +0.3 to +1.3 stops to avoid underexposure and maintain feather detail. Check the histogram, not just the LCD, to avoid clipping highlights.
- Silent/electronic shutter: Use silent mode if your camera has it and it doesn’t cause rolling shutter problems — a quieter camera reduces disturbance.
Composition and behaviour cues
Pay attention to what the birds are doing. Kittiwakes have predictable patterns around nests: commuting flight paths, incoming food deliveries, and social displays on ledges. I look for:
- Approach corridors — where returning adults consistently fly in. Position to capture arrivals head-on or at 3/4 for dynamic wings.
- Perch clusters that show interaction — including bill-tilting, begging calls or preening — useful for storytelling images.
- Light angle — aim to have the sun behind or to the side (dawn usually gives gentle side light); avoid hard backlight unless shooting silhouettes intentionally.
Stability: tripod, monopod or hand-held?
I choose support based on available light and mobility. At dawn I often combine solutions:
- Tripod with gimbal head for heavy glass and prolonged waits — invaluable for precise framing of nests and flight paths.
- Monopod for a balance between support and mobility when gusts make tripods impractical on uneven ground.
- Handheld with high-ISO and IBIS bodies when I need to react quickly to surprise flights.
When on a tripod, turn image stabilisation off on lenses that warn of tripod use; otherwise leave IS on for monopod/handheld work. Use a remote release or the camera’s timer to avoid vibration, especially on slow shutter work.
Practical kit checklist
- Long lens (300–600mm) or spotting scope + adapter
- Sturdy tripod and/or monopod, gimbal head if using heavy glass
- Beanbag — excellent for low-angle shooting from rocks or vehicle windows
- Warm, quiet clothing, waterproofs and headtorch with red filter
- Extra batteries (cold dawns drain power)
- Binoculars for initial scouting
- Field notebook or phone for behaviour notes and times
When something goes wrong: recognise and respond to disturbance
Disturbance can be subtle. Signs include birds freezing on ledges, loud alarm calling, parents abandoning nests briefly or prolonged flushes of adults from cliffs. If you see any of those:
- Immediately back away the distance you came — do not try to photograph more.
- Wait and observe at a much greater distance until the birds have returned and resumed normal activity.
- Report serious incidents to site wardens or local conservation groups so they can advise visitors and, if necessary, take protective measures.
Photographing kittiwakes at dawn can reward you with images full of light, motion and the raw texture of cliff life. The technical side — long glass, fast shutter speeds, and exposure nudges — is relatively straightforward. The harder but more important part is restraint: letting the birds lead the session, not the other way round. Respect for their breeding needs will give you far better opportunities over the season than a single, intrusive close encounter.