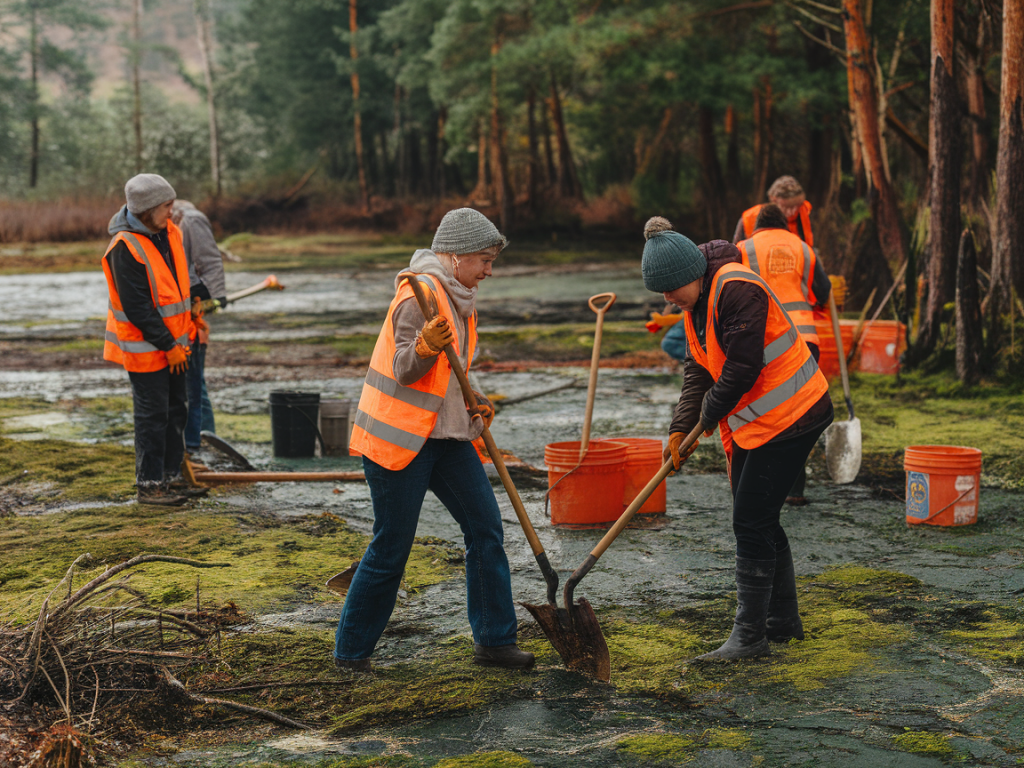
Peatland restoration is one of those practical conservation tasks where a small group of volunteers, the right kit, and a little know‑how can make a real difference. Over the years I've joined peat diggers, drain‑blocking teams and revegetation crews across Britain, and the gear they reach for — from humble wooden stakes to purpose‑made plastic dams — tells you a lot about what works in the field. Below I share the tools and techniques volunteer groups actually use, with notes on why each item matters and a few tips that make life easier on wet, remote sites.
Why a dedicated peatland repair kit?
Repairing peatland involves working in saturated, often remote terrain where simple tasks become heavy work. A dedicated kit keeps teams efficient: you don't waste time improvising, you can prioritise safety, and you leave a smaller footprint because you use materials designed for the purpose. When I turn up to a restoration day, I want a kit that helps me dam drains, stabilise eroded gullies, and reintroduce vegetation — ideally without bringing machinery that would damage the bog.
Core tools and why I pack them
- Peavey / cant hook / grubber — These are invaluable for levering and turning turf and resisting the suction of wet peat. A sturdy timber peavey can move sods and timber dams with less strain.
- Spades and specialist peat spades — Regular spades do the job, but a peat spade with a straight, narrow blade helps cut neat blocks of peat for using as dam material. I keep one with a fiberglass shaft for durability.
- Post‑drivers and sledgehammer — Many rewetting techniques use wooden stakes or posts to anchor dams. A lightweight post‑driver is gentler on hands; a 4–6 lb sledge works where timber is large.
- Woven geotextile and peat mats — These stabilise newly placed peat and prevent washout while vegetation establishes. I favour UV‑stabilised, biodegradable options where possible — they do the job without long‑term plastic linger.
- Plastic peat dams (coir or plastic grip dams) — Preformed plastic (or coir) dams such as D‑bruisers or rock rolls speed up work in long drains. They’re lightweight and often used in combination with wooden stakes.
- Tied bundle of heather/brash — Heather, rushes or brash from site clearance can be used to bulk up dams, trap sediment and encourage sphagnum establishment.
- Rope, ratchet straps and cable ties — For anchoring materials and constructing temporary handholds on steep gullies. I always bring spare lengths — wet rope is fiendish to untangle.
- Hand saw and billhook — Cutting stakes and trimming brash: essential and much quicker than a knife when wood is wet and fibrous.
- GPS device / smartphone with offline map — To log restoration features, record work locations for follow‑up, and for safety. I use a basic Garmin handheld and an app like Gaia or OS Maps as backup.
- First aid kit and bivvy foil — Remote peat sites often mean slow extraction times if someone gets hurt. A compact first aid kit and an emergency foil are non‑negotiable.
Materials I always bring
- Wooden stakes (larch or oak) — Rot‑resistant, locally sourced where possible. Stakes of 30–60 cm length are common; diameter depends on drain width.
- Coir rolls and brushwood — For softer, more natural dams that blend into the landscape and provide immediate substrate for mosses.
- Stone (if available) — Small boulders help anchor dams in high‑flow areas. We haul on foot where vehicles aren’t allowed.
- Sphagnum propagules / donor material — When reintroduction is appropriate, small fragments of sphagnum are used to speed recolonisation. These should be sourced ethically from licensed donors.
How we actually use these tools — typical techniques
Techniques vary with the problem: blocked surface flushes need different approaches from deep erosion gullies. Here are the methods I see most often on volunteer days.
- Peat blocking (turf dams) — Cut sods of peat with a peat spade and wedge them across a drain. Peg with stakes and pack brushwood behind. The fresh peat seals quickly and is effective for smaller drains.
- Wooden stakes + plastic/coir dams — For longer runs we position preformed dams in the channel and hammer stakes through them into the bed. They act as a series of speed bumps, raising the water table upstream.
- Brushwood cribbing — In wider gullies, we form a ‘crib’ of brushwood fixed to stakes, then backfill with peat. This builds a more robust structure suited to heavier flows.
- Interlocking stone and timber — Where stone is available, we create small check dams that dissipate flow energy and trap sediment.
- Sphagnum transplantation — When conditions are right, we transplant small clumps of sphagnum into damp pits or onto coir rolls. It’s delicate work but rewarding; success depends on moisture and shade.
What volunteers should prioritise
- Safety and footwear — Neoprene or heavy wet‑boots, gaiters, and non‑slip soles. Peat can suck and twist ankles; bring poles for balance on steep slopes.
- Leave‑no‑trace thinking — Use locally sourced wood where possible, avoid importing non‑biodegradable materials unless necessary, and pack out any packaging or unused fixings.
- Record keeping — Note GPS points, take before/after photos, and log dam types so project managers can monitor effectiveness.
- Communication — Carry a whistle, group leader should have a prearranged check‑in time with base. Mobile signal is patchy on peatlands.
A few practical tips from the bog
- Bring a pair of lighter gloves to keep in your pack. Heavy leather gloves are great for moving turf, but when you need dexterity to tie knots you’ll appreciate a thinner pair.
- Label stakes with a permanent marker and record their positions — it saves confusion during follow‑up visits.
- Work in short shifts. Wet sites zap energy fast; rotate people so that heavy digging doesn’t fall on the same shoulders all day.
- Use a simple log sheet: date, feature type, materials used, GPS. That record is gold for long‑term monitoring and funding reports.
Example kit table
| Item | Purpose | Notes |
|---|---|---|
| Peat spade | Cutting turf for dams | Fibreglass shaft preferred; bring sharpeners |
| Wooden stakes | Anchoring dams | Larch/oak, 30–60 cm typical |
| Coir / plastic dams | Fast installation across drains | Use biodegradable where possible |
| Brushwood / heather | Bulk and stabilise dams | Source on‑site to reduce carrying |
| GPS / smartphone | Record locations, safety | Offline maps essential |
There’s no single ‘perfect’ kit — the right combination depends on site, scale and protection status — but the items above form the backbone of most successful volunteer peatland repair days I’ve been on. Working on peat is slow, physical and immensely satisfying: those little dams accumulate sediment, raise water tables and, over years, help peatlands recover their function as carbon stores and wildlife habitat. If you’re organising a volunteer day, focus first on safety, logistics and clear goals; the tools follow. If you want a checklist tailored to a specific site you’re planning to work on, tell me the kind of damage and I’ll sketch out a practical kit list for that situation.