I shoot kittiwakes from cliff paths more often than I probably should admit, partly because those colonies are such unvarnished theatre — wings flashing white against blue, call-and-response across the wind. But experience has taught me that good pictures are nothing without restraint. Disturbing a nesting colony can kill chicks and drive adults from nests, so everything I do starts with an ethic: observe quietly, keep your distance, and let the birds dictate how close you get.
Before you go: planning and permissions
The first thing I check is whether the cliffs or reserve have access restrictions. Some colonies are on protected sites and seasonal closures are common. If a ranger or signage asks you to keep to a marked path, do it — not only to avoid fines, but because those paths are placed to minimise disturbance.
I also time my visits. Late morning or early afternoon can be windy and birds are more active, which makes for dynamic shots, but early morning often gives calmer light and calmer birds. During the egg and chick phases (roughly spring to early summer), sensitivity is highest — avoid peak nesting weeks if you can. I always carry a lightweight pair of binoculars (8x42) to check activity before bringing out the camera.
Reading the colony: signs of disturbance
It’s vital to know when you’re causing stress. I look for:
- Adults flushing en masse from ledges — a clear sign you’re too close or too visible.
- Loud alarm calling and frantic circling.
- Abandoned nests or eggs left unattended.
If I see any of these, I step back immediately. Even slow, careful advances can escalate stress; if birds react, withdraw and try from a different angle or a greater distance.
Approach distances and field etiquette
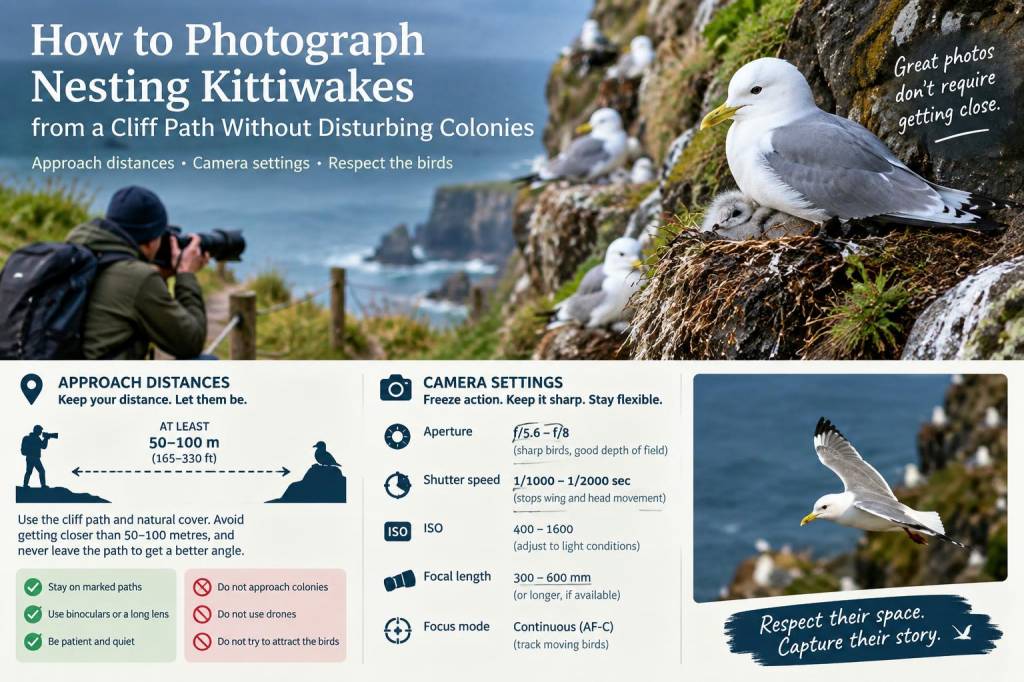
There’s no single rule for distance — geography, colony size and species temperament matter — but I use conservative baselines that prioritise the birds:
- Minimum visual distance: I try to remain at least 30–50 metres from the most accessible ledges when possible.
- Ideal for undisturbed behaviour: 70–150 metres works well for relaxed nesting activity and still gives me good composition with the right glass.
- Reserve the extreme close-ups: I never intentionally close in to under 20 metres from active ledges.
These numbers are guides, not rules. On narrow paths above colonies you may be within that range simply by following the trail; that’s why pointing a long lens and using a zoom is essential. When others are present, I also avoid crowding viewpoints — noise and movement from people can be just as disruptive as a single photographer stepping off-path.
Gear I use and why
My kit choices are practical: light enough for a coastal hike, long enough to avoid approaching birds. Typical setup:
- Canon R-series or Nikon Z-series mirrorless body — good autofocus and high ISO performance.
- 100-400mm zoom (e.g., Canon RF 100-400mm, Nikon 100-400mm) for flexibility from path to ledge.
- 600mm or 500mm prime when I need reach (usually handheld or on a monopod).
- Monopod — quicker than a tripod on exposed cliff paths and less intrusive when moving.
- Neutral-coloured clothing, small backpack, and a polarising filter for glare control on the sea.
I avoid big tripods and large blinds along popular footpaths; they can block the way and draw attention. A monopod or handholding balance lets me move away quickly if birds react.
Camera settings: how I expose and focus
My priority is freezing wing action and keeping eyes sharp while retaining some ambient context. These are my go-to settings in bright coastal conditions:
- Shooting mode: Shutter priority (or manual) — I want control over motion blur.
- Shutter speed: 1/2000–1/2500s for fast wingbeats; 1/1000–1/1600s if the birds are perched or wind is light.
- Aperture: f/5.6–f/8 on a 100-400mm to balance subject isolation and enough depth of field for heads and bodies.
- ISO: Auto ISO with a cap (e.g., 3200) — modern bodies handle noise well and I’d rather raise ISO than compromise shutter speed.
- AF: Continuous AF (AF-C) with a dynamic or zone area. Back-button AF helps, and I use small zones centered on the head/eye when possible.
- Drive mode: 8–12 fps burst for flight sequences, though I’m careful not to waste frames and battery.
- Metering: Evaluative/matrix metering with +/– exposure compensation handy; the sea can fool the metering system into underexposure.
- Format: RAW — the latitude helps recover highlights blown by the sky or the sea.
Composing without disturbance
You’ll make better images by thinking like a walker rather than a stalker. I position myself to include context: cliff face, sea, or the colony’s ledges. A sense of place matters as much as tight portraits. To avoid stressing birds I:
- Use longer focal lengths and crop later rather than moving closer.
- Shoot from slightly below the eye line when possible — it looks natural for cliff-nesting birds.
- Include some environmental space so the photo tells the story of nesting on cliffs.
Practical tips for the field
Small choices make a big difference.
- Move slowly and pause often. Sudden silences followed by movement spook kittiwakes.
- Use natural windbreaks — rock outcrops or vegetation — to shelter from gusts so you aren’t forced to wave a lens around to stabilise.
- Turn off front and rear camera LEDs and use silent shutter/electronic shutter where possible to reduce noise.
- Avoid flash. It’s unnecessary and can cause stress.
- If you’re with others, agree on a single spot to shoot from so the colony isn’t bombarded by multiple approaches.
Table: focal length vs. approximate approach distance
| Typical focal length (35mm eq.) | Effective subject framing | Conservative approach distance |
|---|---|---|
| 100–200mm | Group shots showing ledge and some birds | 50–150 m |
| 200–400mm | Tight group portraits, flight pairs | 30–100 m |
| 400–600mm+ | Headshots, single-bird flight action | 20–70 m |
Post-processing and ethical cropping
I edit gently. I’ll crop to improve composition, but I avoid the temptation to make shots look like they were taken up close if they weren’t. If a photo shows a bird looking stressed, I won’t publish it. In Lightroom I prioritise highlight recovery (sky and sea blowouts), clarity and sharpening around the eye. I keep noise reduction conservative to preserve feather detail.
When to walk away
Finally: leave if the birds show any clear signs of distress. The thrill of a single image isn’t worth lost chicks. I remind myself that the best work is done over repeated, respectful visits — you’ll see different behaviours, light and opportunities without pushing a colony to the edge.