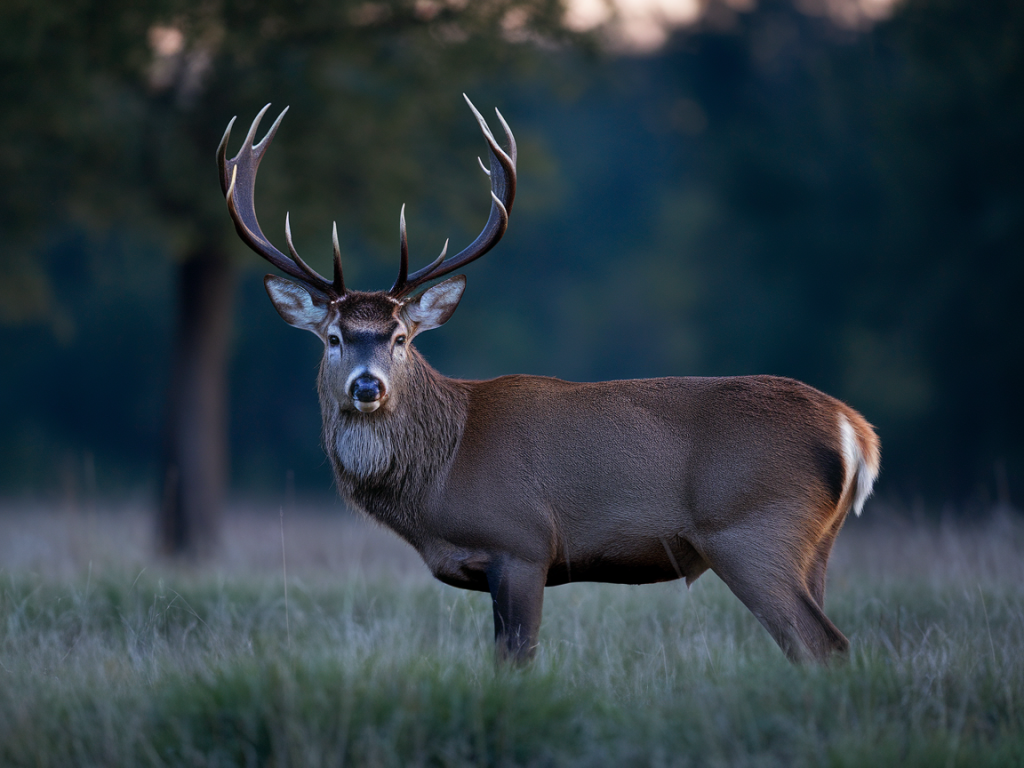
Dusk is the hour when red deer feel most themselves. The hills soften, the air cools and stags step into the light to roar, spar and test one another. For me, photographing the rut is as much about restraint as it is about composition — the best images come from being unobtrusive and patient. Below I share practical, experience-led advice on how to photograph red deer at dusk without altering their behaviour: the distances to respect, the lenses that work, the timing and the techniques that help you stay unseen and safe.
Respect and safety first
Before any technical detail, a clear statement: do not prioritise a photograph over an animal's welfare. Rutting is an energetically costly and stressful period for deer. Disturbance can interrupt mating behaviour, increase injury risk, and push animals into poor habitats at the wrong time. I always start with a mental checklist: keep out of sight, keep scent and noise to a minimum, and be willing to leave early if deer show signs of agitation.
- Keep your distance: for stags in the rut I aim for at least 100–200 metres whenever possible — more if animals are clearly stressed or if terrain funnels them.
- Avoid direct approach: never walk directly toward deer. Use contours, vegetation and established paths to move sideways or parallel to their line of sight.
- Minimise scent: avoid strong-smelling products. Consider wind direction and stay downwind where you can.
- Use a hide or natural cover: a bivi bag or small hide can be invaluable, but set it up well before dusk so the deer don't associate it with a new presence.
Choosing a lens and ideal distances
Your lens choice is dictated by how close you can get without disturbing the deer and by the atmosphere you want to capture. I favour longer lenses for behavioural shots and slightly shorter telephotos for environmental portraits that include the landscape context.
| Lens (approx.) | Usual working distance | Best for |
|---|---|---|
| 400–600mm | 100–300m | Close-ups of stags, headshots, eye contact, behavioural detail |
| 200–400mm | 80–200m | Mid-range portraits, antler detail with some habitat |
| 70–200mm | 30–100m | Environmental portraits, stag within landscape at dusk |
| 24–70mm | 10–50m | Wide scenes, mobs of deer with foreground interest (only if very distant and non-reactive) |
In practical terms: if you can’t reach 200mm without being too close, don't try. A crop-sensor camera or careful cropping can make longer focal lengths unnecessary. For me, a 400mm f/4 with a 1.4x teleconverter is the sweet spot — it gives reach without too much bulk and still performs well in low light. On small-budget setups, a 70–300mm can work but expect to push ISO higher at dusk.
Timing: when to be in position
The rut has a predictable daily rhythm. Activity peaks in the hour before sunset and continues into the early evening light. That said, weather, moon phase and temperature all influence timing. I plan to be in position at least 60–90 minutes before sunset — not only to find a good spot, but to give deer time to settle with my presence. If I arrive at last light, I'm more likely to cause a disturbance.
- Scout by day: learn rutting areas and paths in daylight so you can move silently at dusk.
- Arrive early: set up well before the main activity window; deer will often move into areas as light fades.
- Watch the wind: late afternoon breezes can change; choose positions that keep you downwind of likely approaches.
Light and exposure strategies
Dusk brings low contrast and rich, warm tones — ideal for moodful images — but it's challenging for autofocus and shutter speed. Here are settings I commonly use as a starting point; adjust them for your camera, lens and ISO performance.
- Shooting mode: aperture priority to control depth of field, or manual if you prefer consistent exposure across a sequence.
- Aperture: f/4–f/6.3 on long lenses balances subject isolation with acceptable sharpness.
- Shutter speed: aim for at least 1/500s for moving stags, slower (1/250–1/350s) if deer are mostly stationary and you have IS or a monopod.
- ISO: modern cameras handle ISO 1600–6400 well; don't be afraid to use higher ISO to get a clean exposure and stop motion blur.
- Focus: use single-point AF or a small AF zone and focus on the eye. Back-button focus helps when tracking subtle movement.
Hidecraft and movement
Being invisible is more about behaviour than camouflage. In my experience, slow, deliberate movements and a quiet silhouette are more effective than ghillie suits or flashy camo. Some practical tips:
- Approach using breaks in the terrain; stay low and avoid skyline exposure.
- Move only when deer have their heads down or are obscured; freeze when they lift their heads.
- Limit flash and avoid bright clothing; matte, earth-toned outer layers are best.
- Use a beanbag or monopod for stability; tripods can be noisy unless padded and pre-positioned.
Reading behaviour and signs of stress
If you can read deer behaviour, you can anticipate when to be still and when to photograph. Common cues:
- Relaxed: ears flicking, head down, chewing — safe to photograph at longer range.
- Alert: head up, ears forward, looking towards you — stop moving and reduce camera noise.
- Stressed or agitated: repeated alarm snorts, stamping, grouped huddling, fleeing — back away quietly and leave the area.
- Mobility cues: during sparring, stags are engrossed; avoid being between rivals where your presence could alter the fight.
Ethical dos and don'ts
- Do prioritise animal welfare and the long-term conservation of the site.
- Do use long lenses and plan to crop rather than closing the distance.
- Do report sensitive locations with care; avoid posting exact rut sites that could attract large numbers.
- Don't call deer in, use bait, or attempt to manipulate their behaviour for a shot.
- Don't stay after causing clear disturbance — exit silently.
Practical gear checklist
- Telephoto lens (400mm or 200–400mm recommended) and a 70–200mm for contextual shots.
- Monopod or beanbag for stability at dusk.
- Headtorch with a red filter to preserve night vision.
- Warm, quiet clothing layered for changing temperatures; waterproof outer layer.
- Binoculars for scanning from a distance.
- Map, compass or GPS — rutting areas are often remote and light fades quickly.
Finally, remember that some of the most rewarding images are those that show deer behaving naturally within their landscape. Sometimes that means a distant silhouette against purple hills rather than a close-up headshot. In the rut, patience and respect create opportunities — and often the best photographs are the ones you earned by being small, quiet and considerate in the twilight.