I’m often asked on the path — usually by someone balancing a camera and a wind-blown jacket on a cliff-top — which lens they should bring for “dramatic cliff portraits.” There’s a deceptively simple short answer (bring what you can handle), but the practical truth is richer and rooted in how different focal lengths shape perspective, subject-background relationships, and the way a viewer experiences scale and danger. Below I walk through the choices I make on location, why I choose them, and some practical tips for getting strong cliff portraits without risking yourself or your subject.
Why focal length matters on cliffs
Lens choice changes more than magnification: it affects how the landscape feels. A wide-angle lens exaggerates foreground scale and makes the sea and sky feel vast. A 50mm sits closer to how we see the world and keeps interactions intimate. An 85mm compresses space, isolates the subject and can make distant cliffs loom. On exposed coasts these differences are not academic — they change the perceived relationship between person and place, and therefore the emotional weight of the image.
When to reach for a wide-angle (16–35mm, 24mm)
I use wide lenses when I want the landscape to be part of the portrait in a visceral way. They work best when you can include interesting foreground elements (grassy tussocks, rock ledges, tracks) that lead the eye from the subject into the scene.
- Use wide-angle when: the subject is close to the camera (1–3m) and you want to include foreground context and a dramatic sense of space.
- Effect: expansive, immersive, slightly heroic. The viewer feels like they’re standing at the edge with the subject.
- Watchouts: if the subject is too close, facial features can distort. Keep the subject a little off-centre and avoid placing their head at the extreme edge of the frame to minimise distortion.
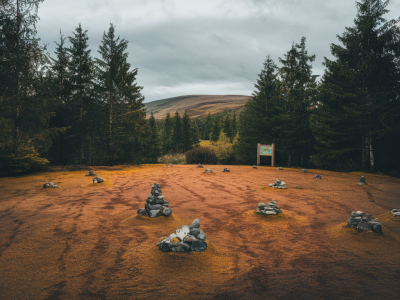
Example setup: 24mm on a full-frame body (or 16–24mm on APS-C), aperture f/5.6–f/11 for depth of field, shutter speed high enough for wind (1/500s+), polariser to deepen the sky and cut glare off wet rocks.
When a 50mm is the sweet spot
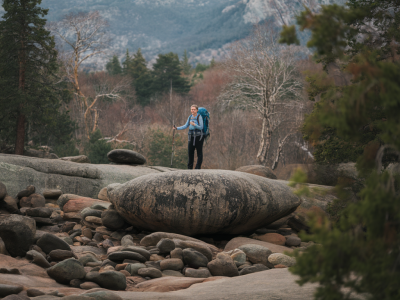
Fifty millimetres is my go-to when I want a portrait that feels natural but still sits comfortably in its environment. At 50mm you can shoot half-body portraits a few metres back and keep both the subject and the cliffscape readable.
- Use 50mm when: you want a balance between intimacy and context — the subject is connected to the landscape but not overwhelmed by it.
- Effect: familiar, human, documentary. It’s closest to how we perceive faces and bodies, so viewers relate easily to images shot at this focal length.
- Working distance: 1.5–5m depending on composition. This gives you room to keep the subject comfortable while still capturing expression and gesture.
Practical notes: a 50mm f/1.8 is a low-cost, lightweight option great for low light and blurred backgrounds; the f/1.4/f/1.2 variants give more subject separation but are heavier and demand more careful focus. On cliffs I typically stop down to f/2.8–f/5.6 to ensure the subject and enough of the background are sharp if wind is moving grasses and hair.
When to use an 85mm (and other short telephotos)
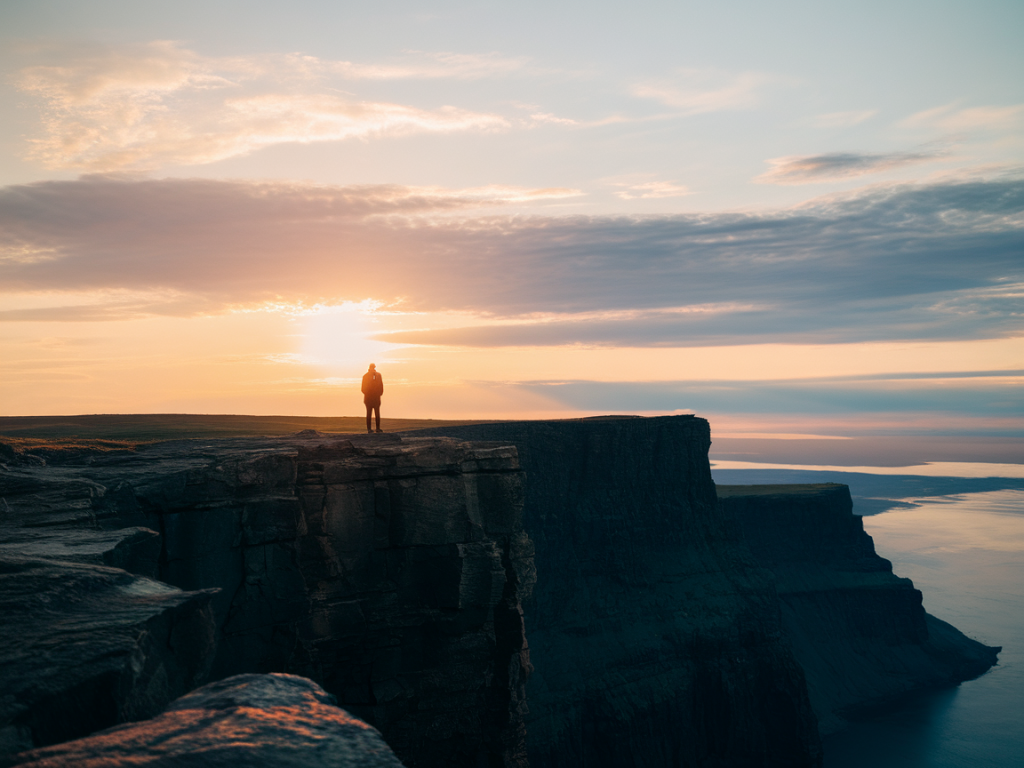
The 85mm (and 70–200mm range) is my choice for portraits that isolate the person and compress distant drama into a near threat — cliffs behind the subject feel closer, the sea becomes a textured band, and the emphasis is on expression and stance more than setting.
- Use 85mm when: you want subject isolation, flattering facial perspective, and compression of background elements to increase scale and drama.
- Effect: cinematic, intimate, compressed. Great for head-and-shoulders or three-quarter length portraits where background detail is secondary to mood.
- Watchouts: you need distance between you and the subject (4–10m+). On narrow cliff paths this can be tricky and raises safety considerations — don’t step beyond secure ground to get a framing you could achieve standing safely.
Comparing the lenses at a glance
| Focal length | Feel | Working distance | Best use |
|---|---|---|---|
| 16–35mm / 24mm | Expansive, immersive | 0.5–3m | Environmental portraits including foreground, cliffs, sky |
| 50mm | Natural, documentary | 1.5–5m | Balanced portraits with context |
| 85mm / 70–200mm | Isolated, cinematic | 4–15m+ | Compressed portraits, headshots, moody details |
Practical considerations on location
A few field-tested rules I follow every time:
- Safety first: never sacrifice footing for a slightly different angle. I’ll move the subject or accept a slightly different composition rather than step past a safe line.
- Communicate with your subject: on a cliff even small gestures can spook them. Explain positions clearly and keep them away from the edge when you’re composing wide shots. I’ll often use a long lens to make the subject comfortable and the result more candid.
- Wind and shutter speed: on exposed coasts I keep shutter speeds high to freeze hair and motion — 1/500s is a useful starting point. For longer lenses, increase speed to prevent blur from camera shake.
- Use a polariser and ND where helpful: a polariser deepens skies and removes reflections on wet rock. For creative motion (waves in the background) use an ND filter and slower shutter speeds — but only from stable, safe ground.
- Bring a fast prime and a versatile zoom: I often pair a 24–70mm (for on-the-move framing) with a 50mm or 85mm prime for portraits. Lighter kits mean less faffing and more time connecting with the scene.
Camera settings and focus tips
Sharp eyes and a sharp sensor are what make a cliff portrait pop. My default settings look like this:
- Aperture: f/2.8–f/5.6 for portraits depending on lens and desired background separation.
- Shutter speed: 1/500s or faster on windy days; aim for at least 1/(focal length) as a minimum for handheld work (e.g. 1/100s for 85mm on modern IBIS bodies is borderline — increase for safety).
- ISO: keep as low as practical — raise to preserve shutter speed rather than risk motion blur.
- AF mode: single-point AF on the eye for still portraits; use continuous AF if the subject is moving on uneven ground.
Finally, remember that lens choice is a storytelling decision. If you want the viewer to feel the edge beneath their boots, reach for a wide lens and embrace the distortion with compositional care. If you want a quiet study of a face and the line of a cliff behind it, let an 85mm compress the world. And when you want the human and the horizon in harmony, the 50mm often wins the seat at my strap.