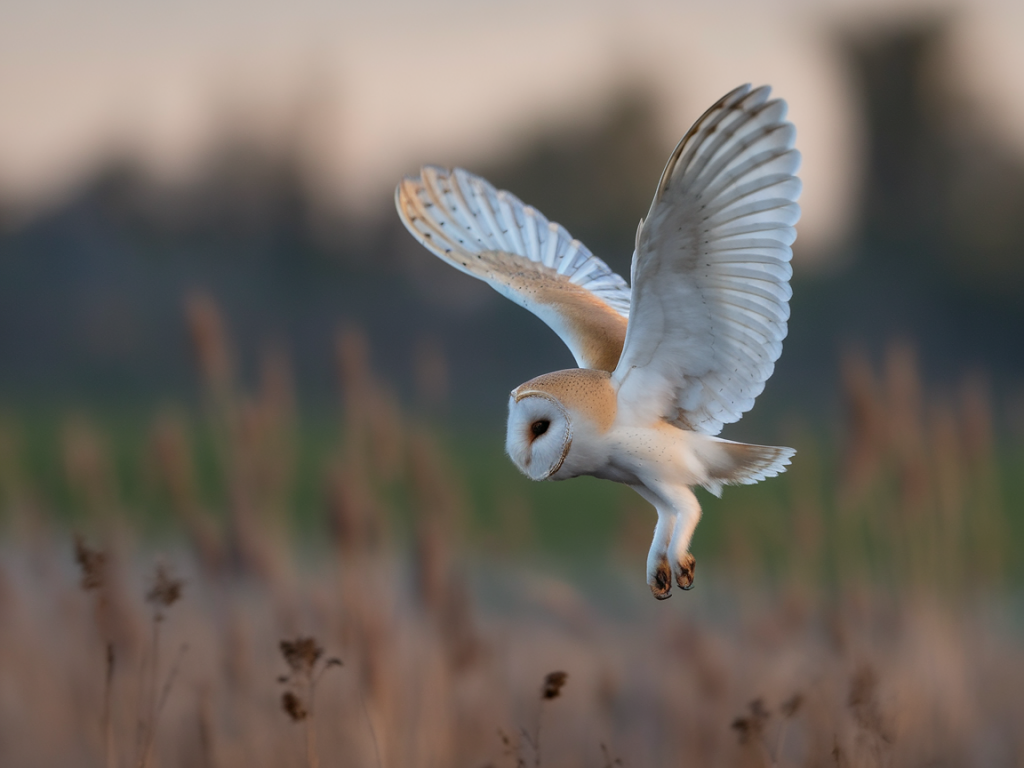
I spend a lot of time at the edges of fields and lanes watching owls. Barn owls are among the most rewarding birds to photograph from a roadside hide because their hunting flights are deliberate, low and often close to the verge. But they’re also sensitive to disturbance and particularly vulnerable when hunting over farmland. Below I share a practical, ethical approach I use for photographing foraging barn owls from a roadside hide: how I choose location and timing, the gear and camera settings I rely on, how I set up to minimise disturbance, and tips for getting images that feel honest and atmospheric rather than staged.
Choosing the right place and time
Barn owls favour open grassland, rough pasture and field margins where small mammals are abundant. I look for signs first: prominent perches (fence posts, gateposts), regular flight-lines along hedgerows, and fresh droppings beneath perches. Farm lanes that edge suitable habitat can be perfect because they offer a vehicle- or ground-level hide position with a clear line of sight.
Timing is everything. Barn owls are crepuscular — most active at dusk and dawn. I aim to be in position at least 45–60 minutes before sunset in summer, and earlier through winter, to avoid spooking the birds with last-minute movement. For dawn sessions the same applies in reverse. Overcast nights with a light westerly wind often produce the most consistent hunting: prey are pushed into the open and owls fly lower.
Ethics and disturbance avoidance
My first rule is simple: if the bird changes its behaviour because of me, I’m too close. Barn owls are easily displaced from prime hunting ground, which can impact feeding success.
- Recon the site by day, note perch locations, likely approach routes and legal access.
- Use a hide or vehicle as a visual screen; keep all movement minimal once in place.
- Keep a respectable distance — often 10–30 metres is enough when using longer lenses. Closer only if the owl is habituated and you have landowner permission.
- Avoid spotlighting or any bright continuous light. Use red-filtered torches for short tasks and shield them carefully.
- Limit session length if birds are present; don’t monopolise a spot night after night.
Hide and approach plan
I prefer a simple roadside hide using my car. It’s quick, warm and provides a low profile. Here’s my usual routine:
- Scout the site in daylight and park beyond the line of sight where possible. Walk into position quietly and set up the hide so your lens faces the likely hunting corridor.
- If using a ground hide (bivi bag or small camo hide), position it behind roadside vegetation or a berm to break up your silhouette. A low, stable stool makes it easier to stay still.
- Wear neutral, non-reflective clothing. Avoid bright head torches and reflective camera straps.
- Keep the hatch or window you will shoot through small to minimise movement and heat signatures.
- Have a plan for getting kit ready before the light you’ll use to avoid fumbling and torch use when the bird arrives.
Essential kit
- Camera body with good high-ISO performance (I shoot with a Canon R6 / Nikon Z6 II / Sony A7 IV depending on availability).
- Fast telephoto lens: 300mm f/2.8 or 400mm f/2.8 is ideal; a 200–600mm zoom (e.g., Tamron or Sigma) gives flexibility and is lighter.
- Sturdy, low tripod or monopod. I prefer a short tripod or a beanbag on my car window for quick adjustments.
- Silent shutter mode or quiet drive to reduce noise.
- Headtorch with red filter, spare batteries, and warm clothing.
- Backup memory cards and batteries — cold drains power fast.
Camera settings — the practical baseline
Night photography of flying owls is a balance: freeze motion, keep noise manageable and retain enough depth of field for the bird to be sharp. Below is a table of settings that I commonly start from; adjust according to light and lens.
| Situation | Shutter speed | Aperture | ISO | AF mode | Drive |
|---|---|---|---|---|---|
| Twilight — hunting low and slow | 1/800 – 1/2000s | f/2.8 – f/4 | 3200 – 12800 | Continuous AF (AF-C), Zone or Wide with face/animal detect | High speed continuous |
| Low light — after dusk | 1/400 – 1/1000s | f/2.8 (as wide as lens allows) | 6400 – 25600 | AF-C, single point or small zone | High speed continuous |
| Perch or landing — more forgiving | 1/250 – 1/1000s | f/2.8 – f/5.6 | 1600 – 6400 | Single AF or AF-C with tracking | Single or low-speed burst |
Notes: I’ll often prioritise shutter speed over everything else because frozen wing detail matters. If light is very low, accept some motion blur for atmosphere by lowering shutter speed to 1/250–1/400s, but only if the bird’s likely flight speed is low and acceptable in-composition.
Autofocus and tracking tips
Autofocus can be unreliable in low contrast situations. To improve hit rate:
- Pre-focus to a known distance (e.g., an obvious fence post) if the owl tends to pass that point; use back-button AF so the camera doesn’t recompose and lose the focus point.
- Start with a wider AF area (zone or dynamic) then switch to single point when the bird is isolated against a plain sky.
- Use animal detection AF if your camera has it — modern bodies are surprisingly good at locking onto eyes and heads even in low light.
- Practice panning smoothly. A fluid head or a low-resistance ballhead helps keep the bird in frame at longer focal lengths.
Exposure, white balance and noise control
I shoot RAW and expose to the right where possible, but don’t overdo this in digital noise-prone shadows. For white balance I usually leave it on auto or set a Kelvin value between 3200–4200K and adjust in post. Noise reduction can rescue high-ISO frames, but it’s better to get sharp images at a slightly lower ISO than rely on heavy processing.
Compositional approaches
For storytelling rather than trophy shots, I look for context: the road, the hedgerow, a distant farm building, or a low sun/sky texture. Negative space is powerful with barn owls — they read well as isolated shapes against twilight. Try to keep the horizon level and allow space in the direction of flight.
Safety and legal points
Always get permission if you’re on private land. Don’t block highways, and ensure your car is off the road and well lit to other drivers so you don’t create a hazard. Barn owls are Schedule 1 (in the UK you must not intentionally disturb certain protected species during breeding — plus it’s poor practice to disturb roosts or nest sites). Avoid repeated disturbance in one location, especially if you find a nesting bird.
Photographing barn owls from roadside hides can yield some of the most intimate and evocative images of these birds when done thoughtfully. Keep the bird’s welfare first, prepare your kit and settings ahead of time, and let patience and quiet observation guide you. If you want, I can share a printable checklist for a roadside night session or walk through RAW processing steps I use to recover detail in high-ISO owl files.