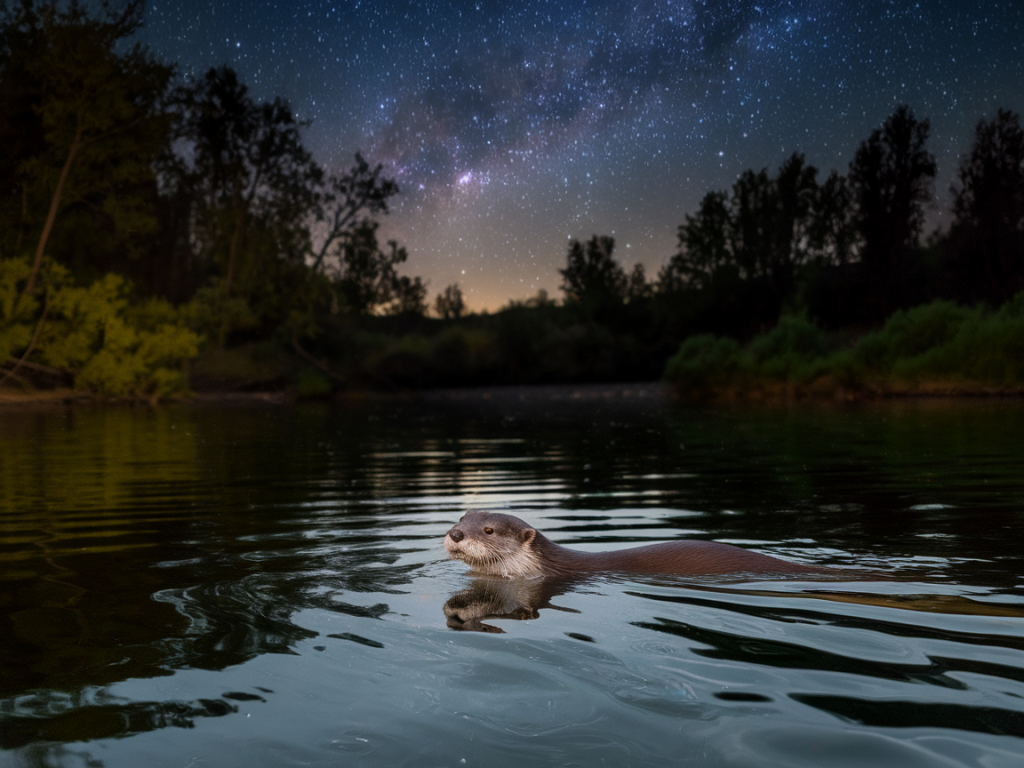
Photographing nocturnal otter activity is one of those rewards that asks for patience, restraint and a small toolkit of techniques. Over the years I’ve learned that getting a usable image is only half the job — the other half is ensuring the animals I’m watching can continue their lives undisturbed. Below I share the camera settings I use in different light, the approach distances that have worked for me, and practical tips for staying invisible in the dark while still coming away with images that feel honest and alive.
Reading the night before you point a camera
Before I even think about aperture or ISO I spend time watching from a distance with binoculars or a spotting scope. Otters have routines: where they enter and exit the water, favourite feeding pools, and the scrub or bank hollows they use as couches. Learning those patterns lets you position yourself so you can see activity without forcing the animal into a reactionary movement.
I time sessions around tide and lunar cycles where possible. On estuarine or coastal stretches, higher tides often concentrate activity closer to banks; on rivers, dusk and the first few hours of night around feeding times are most productive. That knowledge reduces the need to move around at night — the single best way to avoid causing disturbance.
General ethical rules I follow
- Keep distance: never approach when an otter is on land with pups nearby; give extra space at known holts.
- Minimise movement: once set up, I stay put and use remote triggers or long lenses.
- Avoid white flash: I don’t use on-camera flash for active subjects — it’s startling and can damage night vision.
- Limit sessions: I cap observation times and don’t return to the same spot night after night if I suspect stress.
- Follow local guidance: landowners, wardens and local wildlife groups may have specific advice or restrictions.
Approach distances — practical guidance
Approach distance depends on habitat, the individual animals, and whether pups are present. As a rule of thumb I try to maintain a minimum of 30–50 metres in open habitat (riverbanks, estuaries) and even more if the otter is on land and visible. In enclosed or narrow stretches where hiding options are few I back off to 50–100 metres. If an otter changes behaviour (halts, looks directly at you, freezes, gives an alarm call), I move further away immediately.
Some specific points I use:
- If pups are suspected: stay at least 100 metres and avoid repeated visits; disturbance can cause mothers to move pups to new, less suitable sites.
- On busy river sections where otters are habituated to boats or anglers, you can sometimes get closer — but only if you’re completely still and tucked out of sight.
- Use natural screening: reeds, low banks and tree trunks allow me to be closer optically while remaining out of sight.
- When in doubt, watch behaviour. A slight head-turn is different from an alert stop-and-stare.
Camera and lens choices I prefer
For nocturnal otter work I favour a fast telephoto zoom or a prime telephoto, paired with a camera that performs well at high ISO. My kit choices tend to be:
- Camera body: full-frame mirrorless like a Sony A7S series, Canon R6/R5 or Nikon Z series — bodies with strong high-ISO performance and good autofocus in low light.
- Lenses: 70–200mm f/2.8 for flexibility, 300mm f/2.8 or 400mm f/4 when I can’t get close. On tight budgets a 70–200 f/4 with a 1.4x TC is workable.
- Support: a low-profile tripod or a stable bean bag for riverbank shots; a gimbal head is unnecessary for short, static sessions.
- Accessories: radio or cable release, a red-filter headlamp, and a remote camera trap or long-exposure infrared/dedicated wildlife flash units only when used with care and under permission.
Practical camera settings for low-light otter scenes
There is no single perfect setting — water is reflective, animals move, and light changes quickly — but I use the following starting points and adapt on the fly. I shoot RAW and keep a close eye on highlights because water can blow out quickly.
| Scenario | Shutter | Aperture | ISO | AF mode | Notes |
|---|---|---|---|---|---|
| Wide-open river at dusk | 1/250 – 1/500s | f/2.8 – f/4 | ISO 1600 – 3200 | Continuous AF (AF-C), single point | Freeze moderate movement; raise ISO if underexposed |
| Very dark night (no moon) | 1/100 – 1/250s | f/2.8 | ISO 6400 – 12800 | AF-C with wide area or manual focus | Use wide-area AF or pre-focus on likely points; expect grain and use noise reduction sparingly |
| Slow-moving otter in near-dark with reflections | 1/60 – 1/125s | f/2.8 – f/4 | ISO 3200 – 6400 | AF-C or manual depending on contrast | Use monopod or beanbag; accept some motion blur for atmosphere |
| Camera traps / IR setups | Automatic or 1/250s | f/4 – f/5.6 | Auto | AF for testing, then locked | Invisible IR flash is best; test placement to avoid reflective background |
Focusing strategies when light is low
Autofocus can struggle. I often pre-focus on a predicted point — a bend in the bank or a log where otters regularly surface — and switch to manual focus once the lens is locked. If using AF, single point AF in AF-C tends to work best for predictable motion; wide-area AF can help with erratic movements but risks focusing on foreground vegetation.
Back-button focus is a small change that made a big difference for me: it separates focusing from shutter release so I can track without constantly refocusing at the worst moment.
Using artificial light without causing harm
I avoid white flash. Instead, where light augmentation is necessary for a specific project (and only with permission), I use low-power continuous LED panels with a red filter or infrared illuminators. Red light is less disruptive to mammals and preserves night vision, but it still causes curiosity — test it first and keep intensity low.
Infrared camera traps that use 850nm or 940nm LEDs are an ethical option for documenting presence and behaviour without immediate visual disturbance. 940nm is invisible to most wildlife but has shorter range; 850nm gives better illumination but may be faintly visible.
Behavioural cues that you’re too close
Otters give subtle signs: prolonged freezing, repeated looking back at a bank, tail thrashing, or suddenly moving into deep vegetation. If you see these signs, withdraw quietly and increase distance. I’ve found that even a single, abrupt movement by an otter — a leap into cover — often means I’ll not return to that spot for several nights.
Post-processing approach
In development I balance noise reduction with texture preservation — heavy denoise makes fur look waxy. I often denoise luminance more than color, and apply local contrast to the eyes and whiskers so the image feels intimate without overcooking it. For infrared captures, I correct for any green cast and render at a slightly cooler white balance to preserve a night-time mood.
Practical kit checklist
- Fast tele lens (70–200 f/2.8, 300/400 f/4)
- Low-profile tripod or bean bag
- Headlamp with red mode
- Remote release / wireless trigger
- Spare batteries (cold nights drain power quickly)
- Thermal or night-vision scope (optional for detection only)
Photographing otters at night is a balance between technical skill and restraint. If you remember that your presence has a cost and commit to techniques that minimise that cost — distance, stillness, remote capture, and non-invasive lighting — you’ll come away with better photographs and the satisfaction of having left the animals to carry on undisturbed.